

Gutters do unglamorous work, moving rainwater away from your roof and foundation to prevent it from causing problems. Most homeowners think about them twice a year, if that, but in wildfire-prone regions, gutters require a different kind of attention. A debris-filled gutter is one of the most common ember ignition points on the outside of a home.
Gutter guards address both problems at once, reducing debris accumulation, cutting maintenance frequency, improving drainage performance, and—when made from metal—eliminating one of the most predictable fuel sources at your roofline. This guide will walk through how to measure, prepare, and install gutter guards correctly, along with what to watch for and how gutter protection fits into a complete wildfire defense strategy.
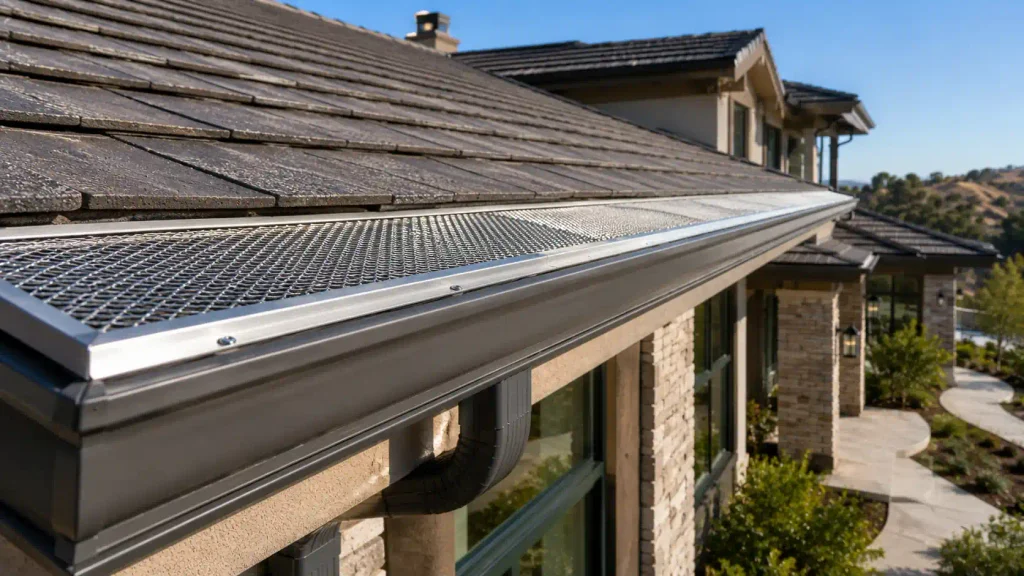
Why Homeowners Install Gutter Guards
Reducing Leaf and Debris Buildup
Gutters continuously accumulate leaves, pine needles, seed pods, shingle grit, and organic debris. Without protection, that material compresses and clogs, causing water to overflow against fascia boards and foundation walls instead of draining through downspouts. In climates with heavy leaf fall or nearby conifers, gutters may need cleaning three to four times per year.
Gutter guards physically block most debris from entering the channel, keeping water flowing freely and dramatically reducing the need for frequent cleanings. For homeowners with long rooflines, multi-story homes, or trees overhead, that maintenance reduction alone can make gutter guards a worthwhile investment.
Supporting Wildfire Home Hardening
In fire-prone areas, the debris management benefit has a second dimension. IBHS Wildfire Prepared Home research identifies accumulated gutter debris as one of the most common ignition pathways on a home’s exterior because dry leaves and pine needles in a gutter are ready fuel for wind-driven embers that land at the roofline.
Metal gutter guards prevent that fuel from accumulating in the first place. They don’t just keep water moving, they remove one of the most accessible ember ignition sites from your home’s exterior. For a full breakdown of how embers exploit roofline vulnerabilities, Firestorm’s guide to how embers ignite homes covers the mechanics in detail.
How to Measure Gutters for Gutter Guards
Accurate measurement is the step many homeowners rush, but it’s the one that determines whether materials fit cleanly or require awkward cuts and create gaps.
Identifying Gutter Size
Most residential gutters are 5″ or 6″ wide (K-style) or 4″ to 6″ (half-round). Measure the interior width of your existing gutter at the top opening, not the exterior profile. Gutter guard products are sized to match standard gutter widths, so confirming your width before ordering prevents the most common purchasing error.
Measuring Roofline Length
Walk each gutter run and measure linear footage from end to end, including sections that turn corners or terminate at downspouts. Add 10% to your total for waste, overlap at joints, and any cuts needed around downspout openings. Measure each roof section separately—gutter length often varies between sides of the house, particularly on complex rooflines.
Common Measurement Mistakes
- Measuring the outside of the gutter instead of the interior opening width produces a size mismatch.
- Failing to account for downspout collar positions means the guards won’t lay flat.
- Ordering a single total without noting individual section lengths creates fitting problems at joints and corners.
Take notes section by section rather than trying to calculate totals in your head.
Tools and Materials Needed Before Installation
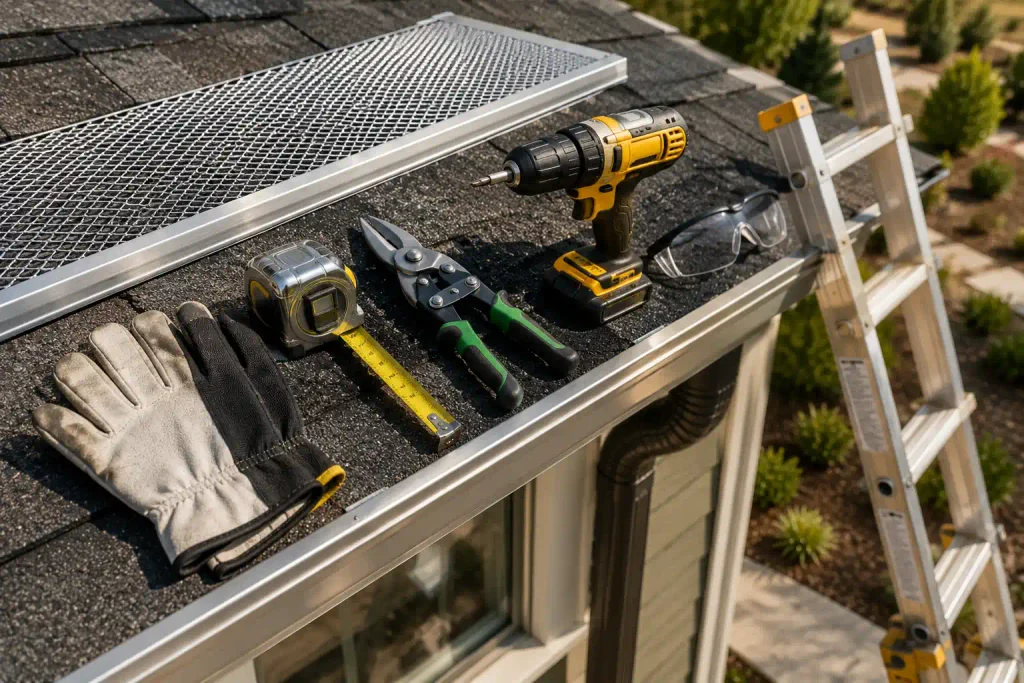
Essential Installation Tools
- Ladder rated for your roof height, properly footed and secured
- Measuring tape
- Aviation snips or metal shears (for cutting metal mesh guards)
- Gloves—metal mesh edges are sharp
- Safety glasses
- Cordless drill or screwdriver (for screw-attachment systems)
- Garden hose (for post-installation flow testing)
Never work on a ladder alone. Have someone present to steady the base and hand materials up.
Choosing the Right Gutter Guard Material
Plastic and foam gutter guards are common and inexpensive, but they’re also inadequate for wildfire-prone areas. Both materials can melt or ignite when exposed to embers, eliminating their function at the exact moment roofline protection matters the most.
Metal mesh gutter guards, aluminum or stainless steel, are the appropriate choice for fire-conscious homeowners. They don’t burn, they don’t melt, and they physically prevent the debris accumulation that creates roofline fuel beds. FireStorm® Gutter Guards are metal mesh systems designed specifically for this application.
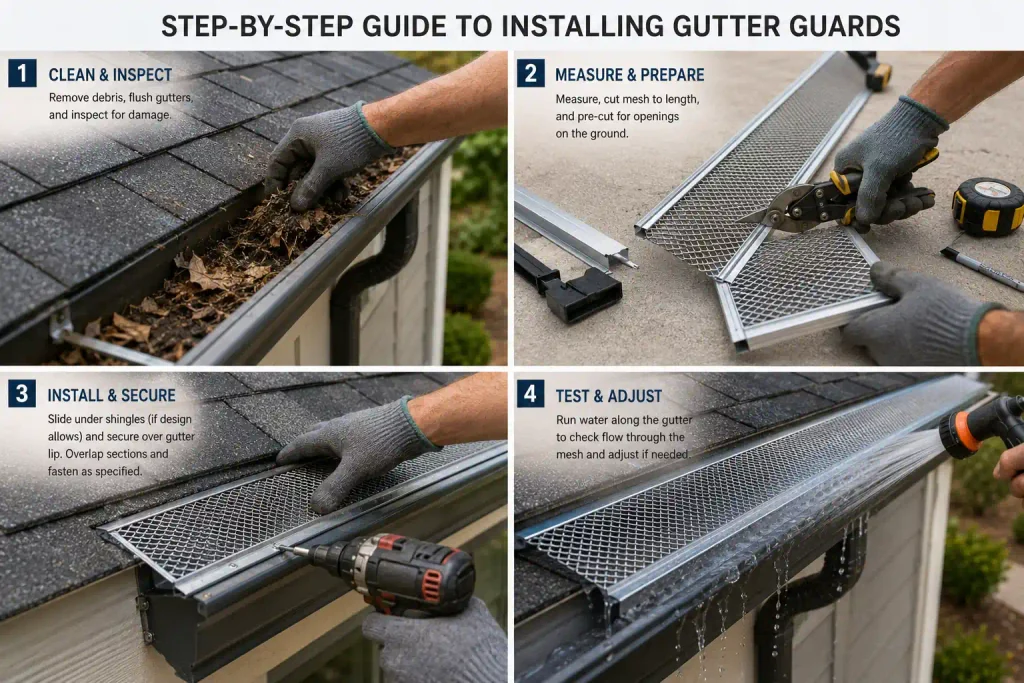
Step-by-Step Guide to Installing Gutter Guards
Installation procedures vary by product, so always read the manufacturer’s instructions before you begin. The following sequence applies broadly to metal mesh gutter guard systems.
Step 1: Clean and Inspect Existing Gutters
Before any guard goes on, gutters need to be clear and structurally sound. Remove all debris by hand or with a gutter scoop, flush with a garden hose, and confirm water drains freely through downspouts. Inspect the gutter channel for rust, holes, separated seams, and loose hangers. A gutter guard installed over a damaged or sagging gutter still won’t fix drainage issues—you need to fix the gutter first.
Step 2: Measure and Prepare Materials
Lay out your materials on the ground and cut sections to length before ascending the ladder. Most metal mesh guards cut cleanly with aviation snips. Mark cut lines with a marker rather than estimating by eye. Pre-cut sections for downspout openings, end caps, and corner transitions while you’re still at ground level—it’s faster and safer than trying to cut on a ladder.
Step 3: Install and Secure the Gutter Guards
Working from one end of the gutter run, slide the leading edge of each guard section under the first row of roof shingles (where the product design allows) and snap or fasten the outer edge over the gutter lip.
Overlap sections by the amount specified in the manufacturer’s instructions, typically 1″ to 2″. Secure screw-attachment systems at the intervals specified; under-fastening allows guards to shift under debris load or wind. Do not over-tighten fasteners on aluminum because it deforms the channel.
Step 4: Test Water Flow and Final Adjustments
With guards in place, run a garden hose along the full length of each gutter run at moderate pressure. Confirm water enters the guard surface, passes through the mesh, flows along the gutter channel, and exits through the downspout without backup or overflow. If water sheets off the guard surface instead of penetrating, check for debris on the mesh surface or excessive pitch toward the fascia. Make necessary adjustments before descending.
Common Gutter Guard Installation Mistakes
- Skipping gutter cleaning before installation: Guards installed over existing debris trap that debris permanently and create immediate drainage problems.
- Incorrect measurements leading to gaps: Gaps between guard sections, at end caps, or around downspout collars leave entry points for debris and embers, defeating the purpose of the system.
- Poor fastening: Guards that aren’t secured properly lift in the wind, shift under debris load, and create edge gaps that make them ineffective.
- Installing over damaged gutters: A guard system on a sagging or leaking gutter channel doesn’t fix drainage; it just hides the problem and makes future repair harder.
- Choosing non-metal materials in fire-prone areas. Plastic and foam guards can melt or ignite. In a WUI zone, material choice isn’t a cost-efficiency decision; it’s a safety decision.
Why Gutter Guards Matter During Wildfire Season
How Embers Ignite Debris-Filled Gutters
Wind-driven embers travel along roof surfaces and collect at the roofline edge, where gutters sit. A gutter full of dry leaves and pine needles becomes a fuel bed in one of the hottest areas of the home exterior. A single ember landing in accumulated debris can establish a fire that spreads to the fascia, soffit, and roof deck before becoming visible from the ground. Post-fire structure assessments consistently identify gutter debris ignition as a common failure point in homes that burn during wildfire events.
Metal Gutter Guards and Ember Protection
Metal gutter guards prevent the fuel from gathering. When there’s no accumulated debris to ignite, a landing ember has no material to sustain combustion at the roofline. That is why material choice matters: a plastic or foam guard that melts under ember exposure doesn’t just fail at its primary job—it can become part of the ignition sequence, potentially causing further loss. FireStorm® Gutter Guards are designed as a wildfire home-hardening component, not just a maintenance convenience, as shown in the material specification and in how the product performs when conditions escalate.

Gutter Guards as Part of a Complete Wildfire Defense Strategy
Gutter protection addresses one specific ember pathway: roofline fuel accumulation. It works best as part of a layered approach that addresses the full building envelope:
- Ember-resistant vents at every vent opening (eave, soffit, gable, dormer, foundation) block the primary ember entry pathway into enclosed spaces
- EmberMesh™ covers secondary gaps, including deck skirting, crawlspace perimeters, fence connections, that vents don’t address
- Defensible space and Zone 0 management reduce ember production near the structure
- Routine seasonal inspection keeps all protective systems functioning as installed
For the full picture on how these components work together, Firestorm’s complete wildfire defense system guide and ultimate home wildfire protection guide cover the integrated strategy in detail.
Correct Gutter Guard Installation Is Critical
Gutter guards are one of the more accessible wildfire home-hardening upgrades available, and they’re practical, DIY-friendly, and directly address a known ember ignition pathway. Installed correctly on clean, sound gutters using metal mesh materials, they reduce maintenance burden and eliminate roofline fuel accumulation at the same time.
The installation process is manageable for most homeowners with basic tools and careful measurement. The most common mistakes—skipping pre-installation cleaning, taking imprecise measurements, choosing the wrong material—are all avoidable with proper preparation.
Start by walking your roofline and looking at what’s in your gutters right now. If you find accumulated debris, you have an addressable vulnerability. Installing guards before fire season is much easier than managing the alternative.

